Manually Installing a Neo4j Database on an Azure VM
Neo4j is a graph database used for storing connected data in a graph rather than a traditional relational database such as SQL Server or Oracle. This article talks about the manual process for hosting a Neo4j database on an Azure virtual machine and configuring ACL restricted remote connection. This is an IaaS (Infrastructure as as Service) deployment as we're manually creating a VM and installing and configuring the software on there.
There are some other good articles on deploying Neo4j to Azure here, but we'll go through how it all fits together and go into more detail about ACL here.
It's possible to deploy Neo4j as a cloud service (PaaS) with startup tasks to do the installation, however there are still a number of manual modifcations to make, so unless you need a number of deployments, it may not be worth the extra overhead.
Creating a VM
First of all we need to create a VM on Azure so login to the portal (I'm using the old portal as the new one isn't feature complete yet), go to the Virtual Machines workspace, then click the +NEW button in the toolbar and fill in the new VM details:

The size of the VM is quite important for a Neo4j server as we can scale-up (more CPU, memory etc) but not-scale-out (multiple instances) because the database engine can't currently partitioned.
Downloading Installers
Once the VM is created, click the CONNECT button on the VM workspace toolbar to download the RDP (Remote Desktop Protocol) shortcut which you can use to remote desktop to the server. Accept all the warnings an you should see the server desktop.
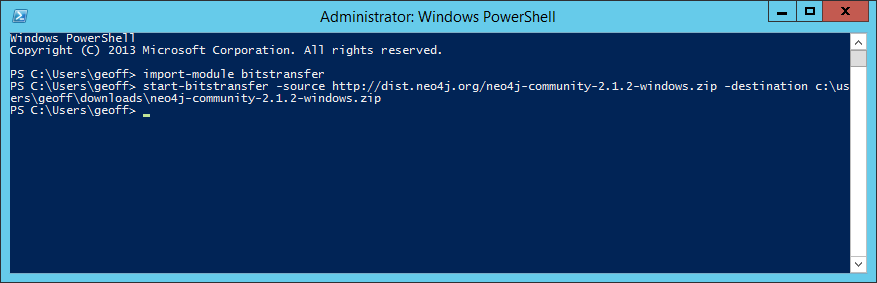
Go to the Neo4j download site and locate the zip version so we can install it as a service. It's a pain to download things on a sever as IE is quite tightly locked down, so the easiest way is to use the PowerShell BitsDownloader module. To do this, open PowerShell from the server desktop or start menu and enter the following command to load the module:
import-module bitstransfer Then enter a command like this to download from a URL to a location on the server:
start-bitstransfer -source http://dist.neo4j.org/neo4j-community-2.1.2-windows.zip -destination c:\users\geoff\downloads\neo4j-community-2.1.2-windows.zip A nice progress indicator appears as the file downloads. My console looked like this:
Neo4j as the j suggests runs on JRE so we need to download that too. I got an installer from a mirror site as the Oracle link doesn't work with bittransfer due to the usage policy:
start-bitstransfer -source http://java64.net/download/jre-8u11-windows-x64.exe -destination c:\users\geoff\downloads\jre-8u11-windows-x64.exe
Installing the Service
Follow this procedure to install the service:
- Extract the contents of the zip file and copy to where you want the service to run from
- Open a command prompt (just type cmd on start screen)
- Change directory to the neo4j bin folder and run Neo4jInstaller.bat install.
- The service can be started with the following command:
sc start neo4j-server - The service can be stopped with the following command:
sc stop neo4j-server - By default it's set to start automatically when the server starts.
- If we want to allow remote connections (which is highly likely)we need to allow the server to accept connections from remote machines so stop the service, then open the following config in notepad:
conf\neo4j-server.properties - Find the following section:
# Let the webserver only listen on the specified IP. Default is localhost (only # accept local connections). Uncomment to allow any connection. Please see the # security section in the neo4j manual before modifying this. #org.neo4j.server.webserver.address=0.0.0.0 - Uncomment the last line and save the file:
org.neo4j.server.webserver.address=0.0.0.0 - If you want to change the port, you can do this here too
- Start the service again
- Test the browser page opens locally in the browser:
http://localhost:7474/browser
Configuring the Server Firewall
We need to add a firewall rule to allow remote machines to connect to port 7474. Follow this procedure to do this:
1. Open Windows Firewall with Advanced Security from the Server Manager menu:

2. Click New Rule in the actions menu and select Port in the New Inbound Rule Wizard:

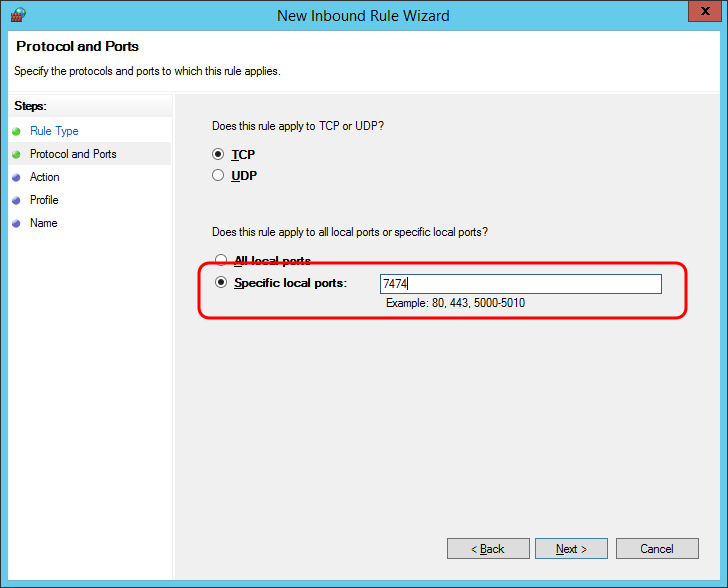
3. Click Next then enter the port number in the Specific local ports box:
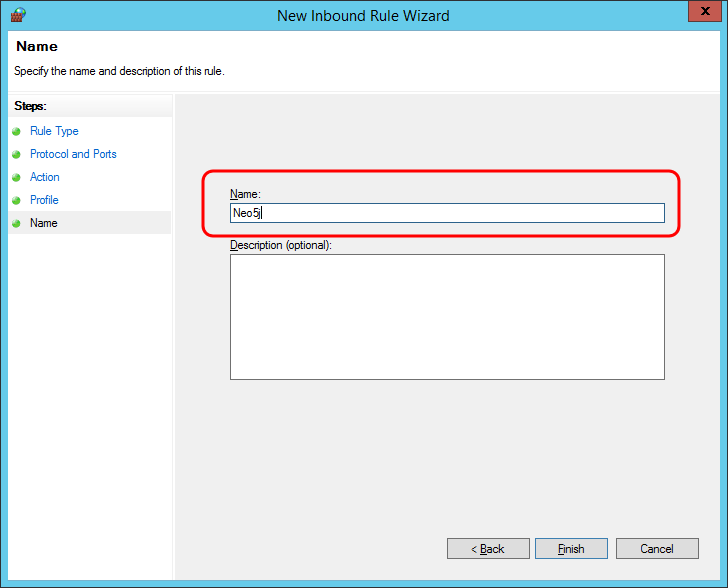
4. Click Next 3 times, then enter a rule Name and click Finish:
Configuring an Endpoint
Now we've got the internal firewall setup systems on the internal Azure network can connect but if we want to connect from an external network, we need to configure a public endpoint so the Azure load ballancer will allow connections through. To configure an endpint follow this procedure:
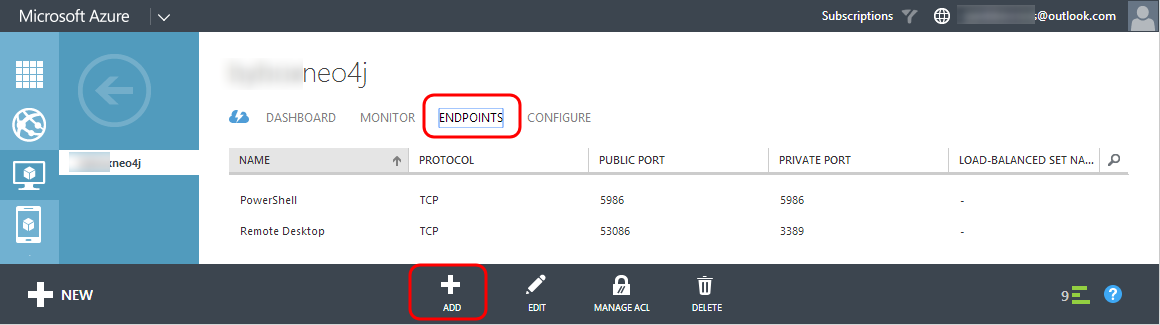
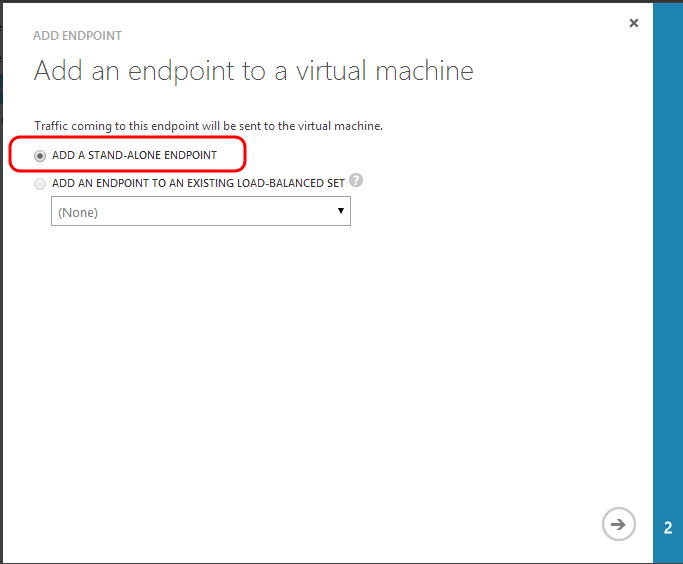
1. In the Azure portal navigate to our VM in the Vitual Machine workspace and cliek on the ENDPOINTS tab, notice we have endpoints already configured for PowerShell and Remote Desktop (which is how we got in there in the first place!). Click add on the toolbar to add a new endpoint:
 2. Leave the default ADD A STAND-ALONE endpoint as we can't load-balance the database:
 3. Click the next arrow and fill in the name and ports:
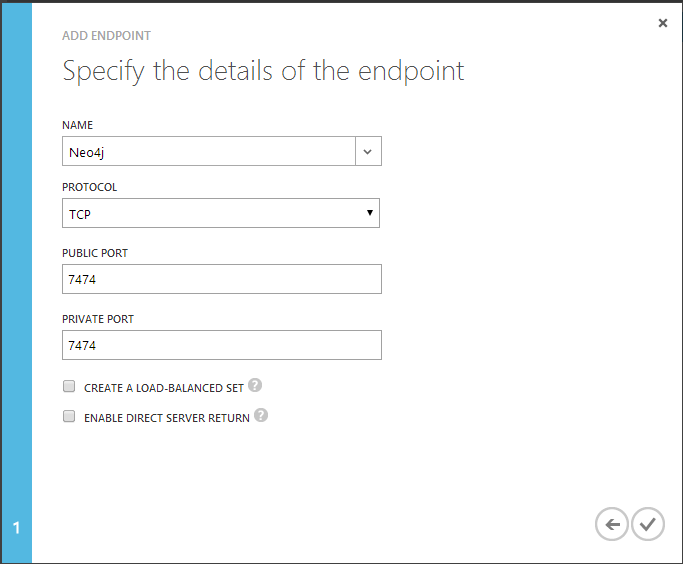
4. Click the tick to finish
5. You should now be able to connect remotely in a browser with a url like this:
http://myvmname.cloudapp.net:7474/browser/
Configuring ACL
Now that we have an endpoint to connect to anybody on the internet can connect, so it's a good idea to lock it down to a selection of individual IP addresses or ranges of IP address using Access Control List.
We'll add ACL rules for individual IP addresses and IP ranges in the following proceedure:
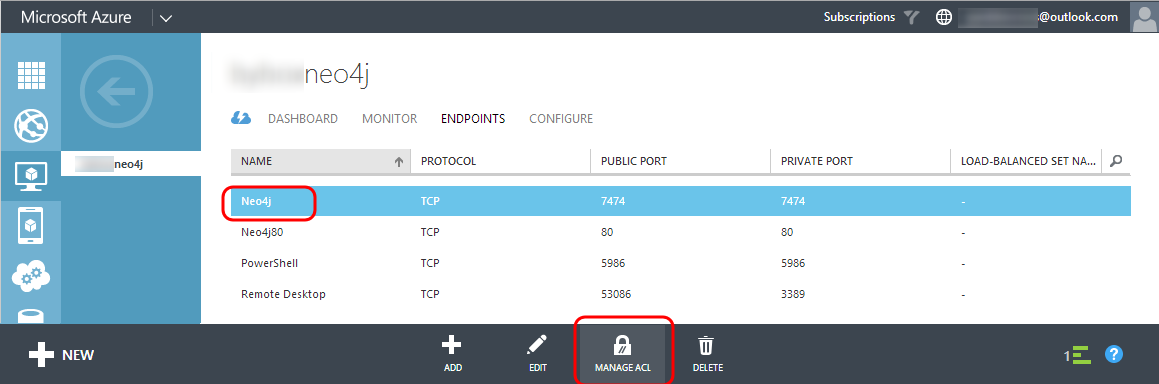
1. Select the endpoint we just created and click MANAGE ACL on the toolbar:
2. Add a description and enter the single IP address with /32 to lock down the CIDR address to a single IP address range:

3. Next we'll add a range of addresses, I used this online tool to calculate the CIDR address from my IP range, then added that.
4. Finally add a Deny to all other addresses:

5. Test that the browser site still loads (it may take a while for the ACL permissions to take effect)
6. Test that a remote machine outside the permitted list can not see the site. It's important to put the Permit rules before the Deny rules otherwise they will not work.
Conclusion
We've had a good look at the different aspects of what is required to host a Neo4j database on Azure VM and it's been a worthwhile excercise in understanding how Neo4j is installed as a service, how to setup the server and how to configure the VM's Endpoints and ACL.